Hatching Chicken Eggs: 10 Tips

By Jennifer Murtoff, Home to Roost LLC

Chicken egg incubator
Incubator with chicken eggs

You’ve got your incubator and fertilized eggs, and you’ve read all the instructions on hatching and caring for chicks. Here are some tips for a good hatch.

Housing plans: While this isn’t directly related to incubation, it’s an important point to remember! The majority of flock owners hatch eggs to get more hens. A hatch is naturally 50 percent female and 50 percent male, so before you set the eggs, make sure you have a plan for the roosters. 

Prepare well: Carefully follow the instructions that come with your incubator regarding humidity, temperature, egg turning, and location. Small changes in environment can have large consequences. Run the incubator for several days before setting the eggs and monitor the conditions. Make adjustments if needed. This ensures that the temperature and humidity will be consistent and that the incubator is working properly when you’re ready to set the eggs.

X (and O!) mark the spot: If you are turning eggs by hand, mark a X on one side and an O on the other so that you can tell which side of the egg is facing up. Be sure to use a pencil: eggs can absorb toxins from inks.

No peeking: Open the incubator as little as possible to prevent heat and humidity loss. A consistent temperature and humidity are important for the development of the eggs.

Check for development: Candle a few eggs at a time after day 7 and remove any that are infertile or that have stopped developing. This prevents harmful gases from circulating in the incubator. Hold the eggs over a candler or powerful flashlight. Note: It’s harder to candle eggs with dark shells.

Candled egg showing embryo
A candled egg showing embryo

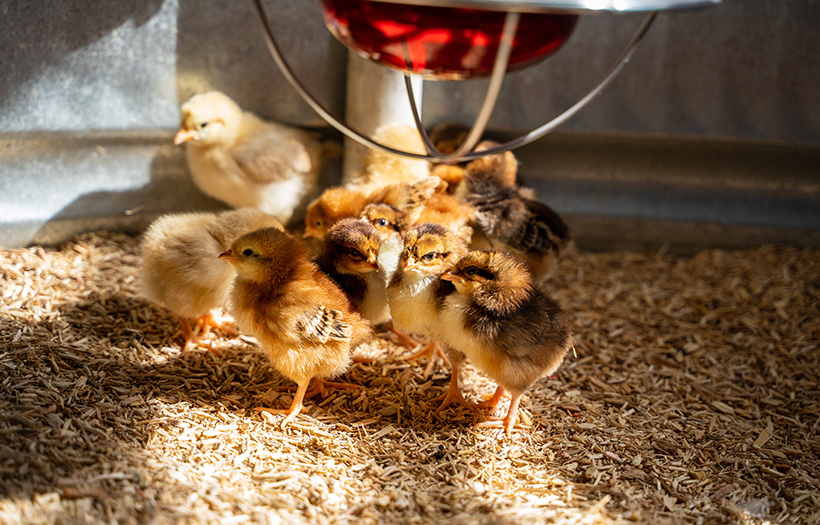
Prepare the brooder: A day or two before the hatch date, set up your chicks’ new home, or brooder, in a room with a consistent temperature. Monitor the temperature in the brooder to ensure that it is consistent. Make sure you are prepared with a feeder and waterer for chicks.

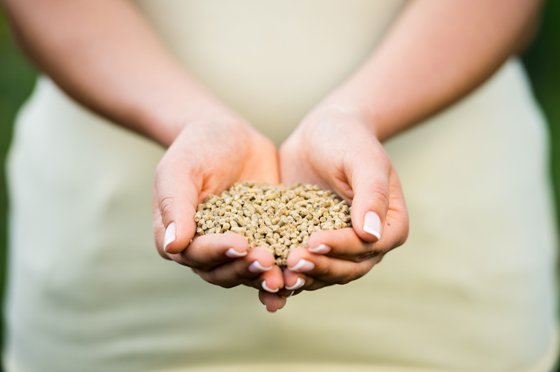
Good feed, good start: Buy your chick starter or a starter/grower before the chicks hatch. A quality feed gives your birds the best start possible. You can learn more about medicated vs. nonmedicated chick feeds in this video and this article.

Let Mother Nature do it: Resist the urge to help chicks out of the shell. You can harm the chicks if you remove them too soon. This long process can take as many as 24 hours, and the healthy, strong ones will make it out. Leave viable eggs in for up to two extra days.

A healthy chick will hatch with no human assistance.

Let them dry off: The chicks will be damp and may not move a lot after they hatch. Hatching is exhausting! Leave the chicks in incubator until they are fully dry and fluffy. Then you can transfer them to the brooder box.

A newly hatched wet chick

Clean up: When the hatch is done, use a solution of 10% bleach/90% water to sanitize the incubator. Then wash it with warm, soapy water and rinse thoroughly. Always clean between hatches to prevent disease transmission.

Now get ready to enjoy your new chicks!


Feeding Chicks: Making the Transition to the Coop

What to Feed chicks

Congratulations, your chicks have made it to the transition stage!

A few weeks have passed since you brought those little balls of fluff home, and it’s time to formulate a plan on housing, because your flourishing chicks will soon outgrow that brooder.

Here are a few tips on transitioning to the coop some tips on feeding chicks and chick feeding recommendations as your babies grow into healthy adult birds.

Housing Upgrade

The change in environment can be a big one for your chicks, so consider these tips as you move them from brooder to adult coop:

  • Chicks should be mostly feathered – At 5 to 6 weeks your fluffy chicks will start to resemble adult birds by growing out pinfeathers.
  • These adult feathers will help them regulate their body temperature better than fluffy chick down.
  • Chicks should be acclimated – Although they start off at 90 – 95 degrees in the brooder the first week of life, you need to decrease this temperature each week until the temperature inside the brooder is close to what daytime temps will be. For the first few weeks (and especially if outdoor temperatures are fluctuating), you may want to bring the birds back into the brooder at night or in bad weather.
  • Chicks should be integrated – Nobody wants hen-house drama, and taking a few simple steps to introduce new birds to old will save a great deal of time and potential injuries.
    • These steps include having a “get acquainted” phase when the new and old birds are in separate, but attached areas so they can interact without aggressiveness.
    • You also want to do the coop consolidation at night so that the old and new flock wake up together, which can help minimize bullying.

On the Menu

At this point it is also important to remember, if you have youngsters joining your existing flock, to only feed chick starter to all birds until the youngest bird is 16 weeks.

The extra calcium in regular layer feed can harm young chicks. Once you’ve reached the 16 week mark, it is safe to switch to layer feed.

Your girls will most likely not be laying until they are around 24-26 weeks old, but it is important to build up the calcium level in their system. Using a layer crumble makes the transition a little easier.

Chicks should also be eating treats and grit by now. It’s a great idea to get your birds used to eating treats (if you plan to offer them) a few days prior to putting them outside. That way, you can use the treats to lure the birds into a secure space at night, if needed.

Until they are used to thinking of the coop as “home base” they may need just a bit of encouragement to go back in at night.

Just remember, if you start feeding treats, you should offer no more than 10-15% of the total diet as treats, so that you don’t create nutritional imbalances in their overall intake.  Also, you should offer a grit free choice to aid in digestion.

Chick Life Stages – What to Expect

You’ve just arrived home with a brimming box of peeping chicks, how exciting! The journey you are about to embark on is an exciting one, so get ready to learn about chick life stages and love those new fluffy creatures.

What to Expect – Week 1:

Before you go to pick up your new chicks, make sure the brooder is ready to go at home. This will prevent any unnecessary stress, for both you and the chicks.

Expect some peeping as the chicks get acquainted in their new environment, learning to drink and eat. They will likely do this for 4 or 5 days.

If the peeping seems to be excessive, make sure you evaluate the brooder for anything that may be causing distress.

A good indicator on temperature is to evaluate where the chicks are located. If they are spread out, they are likely comfortable.

HELPING BABY CHICKS THRIVE – Learn the basics

If they are huddled under the heat source, they may be too cold and temperature adjustments should be made.

If they are on the edges of the brooder (not under the heat source) then they are likely too hot.

Don’t forget, the journey to their new home was a long one, so consider providing some bottled water with vitamins and electrolytes for the first 3 days.

Chick Life Stages: What to Expect – Weeks 2-3:

After the first week, their down will start to turn into feathers, and by week 4 you can expect to see more feathers than down.

With adequate food, water and proper temperature, your chicks should be acclimating quite well to their new home.

Don’t forget the importance of brooder maintenance during this time.

To keep odors at bay and cleanliness paramount, make sure you are cleaning out the brooder once a week and adding fresh shavings.

Place the waterer in the corner to prevent dampness throughout the entire brooder.

What to Expect – Weeks 4 – 6:

At this time, you may notice your chicks starting to test their wings.

At week 6, the brooder is likely getting a little crowded, and you should consider the transition outside to the coop.

It’s wise to choose a nice day to do this, as it will be less of a shock to the birds.

It’s important to note that during this transition, you should make sure your chicks are fully feathered so they are prepared for the elements.

A gradual integration of new chicks with mature hens may be necessary to prevent older birds from picking on the young birds.

A good option is to separate the two groups with a gate or some fencing, so they can be exposed to one another before being fully integrated.

New Chick Checklist – Tips for Getting Started

New Chick Checklist

Are you a new chick owner? Then this guide is for you!

Chicks thrive in ideal conditions, so consider these tips for getting started:

  • Heat: Suspend a warm bulb about a foot above the brooder floor for warmth – and have a second bulb on hand in case one burns out. Keep temps in the brooder about 90-95 degrees F for the first week, decreasing about 5 degrees per week. Raise the light as chicks grow.
  • Environment: Be sure your brooder is big enough so your chicks can move about comfortably. Keep it out of drafts. Stock tanks, plastic tubs and homemade brooders are a few good options. Do not allow the brooder to become wet or damp.
  • Bedding: Pine wood shavings are ideal. Avoid straw and newspaper as these become slippery for chicks. Clean bedding daily.
  • Water: Be sure clean, fresh water is always available. Dip chick beaks into water and let them drink 4-5 hours before introducing feed. Elevating the waterer a couple inches off the floor will help it stay clean and prevent bedding from contaminating it.
  • Feed: Scatter feed on the brooder floor so chicks can find it at first. Then place in a feeder. Have chick starter feed available 24/7. Your chicks will eat just what they need. One chick will eat about 10 pounds of chick starter in its first weeks of life. There are some great options available when considering chick starter feeds.

The right nutrition at the right time for layers

Timing is everything when it comes to feeding your laying hens. Ensuring they have the correct nutrition at just the right time is an important part of having a happy and healthy flock.

Hatch to approximately week 6: Provide free choice access to a quality chick starter ration and make fresh clean water available at all times. Proper nutrition in this critical growth stage will impact the performance of the chicken for their entire lifespan. Use a heat lamp to keep birds warm and provide 1 sq. foot per chick.

Approximately 6 weeks to 16 weeks: Continue to provide free choice access to chick starter and water. If you choose to feed treats (scratch grains, kitchen scraps, etc.), put out what birds will consume in about 15 minutes once per day. This a good guide to follow to make sure treats don’t exceed 15% of the total diet. Add treats only after week 6. If birds have access to anything other than a crumble or pellet, provide grit free choice in a seperate feeder.

16 weeks +: Now is the time to switch to layer feed! Provide layer pellets or layer crumbles and grit free choice along with access to fresh clean water at all times. Treats can be provided at no more than 15% of the diet. At this point it is also important to make oyster shell available free choice to provide supplemental calcium for hard-shelled eggs. Adult birds require approximately 3-4 sq. feet of space per bird in the coop; you also need to plan on one nesting box for every 4-5 hens.

Bringing Baby Chicks Home: Setting Up the Brooder

When you bring home new baby chicks, there are a few things you will need to know to have a successful start.  Check out this video from Nutrena Poultry Specialist Twain Lockhart for details.

Thanks for watching! Please leave any comments or questions you have.

Privacy Policy | Terms